This post walks through setting up the Elastic Connector locally with Docker, step by step, with instructions and screenshots along the way.
Note: This guide focuses on the Elastic Connector for Confluence. (The Elasticsearch Project, as you may know, is serverless.)
FYI: As of February 3, 2025, the Elastic Connector for Confluence doesn’t include a native UI. There are two ways to set it up:
- Via Docker: Using the pre-built Docker image.
- From Source: Building and running the connector locally.
This guide covers the Docker method.
Prerequisites
Before you begin, make sure you have:
- Docker installed and running.
- Access to the Elastic Serverless Project.
- Confluence Cloud Admin Access or the necessary API keys.
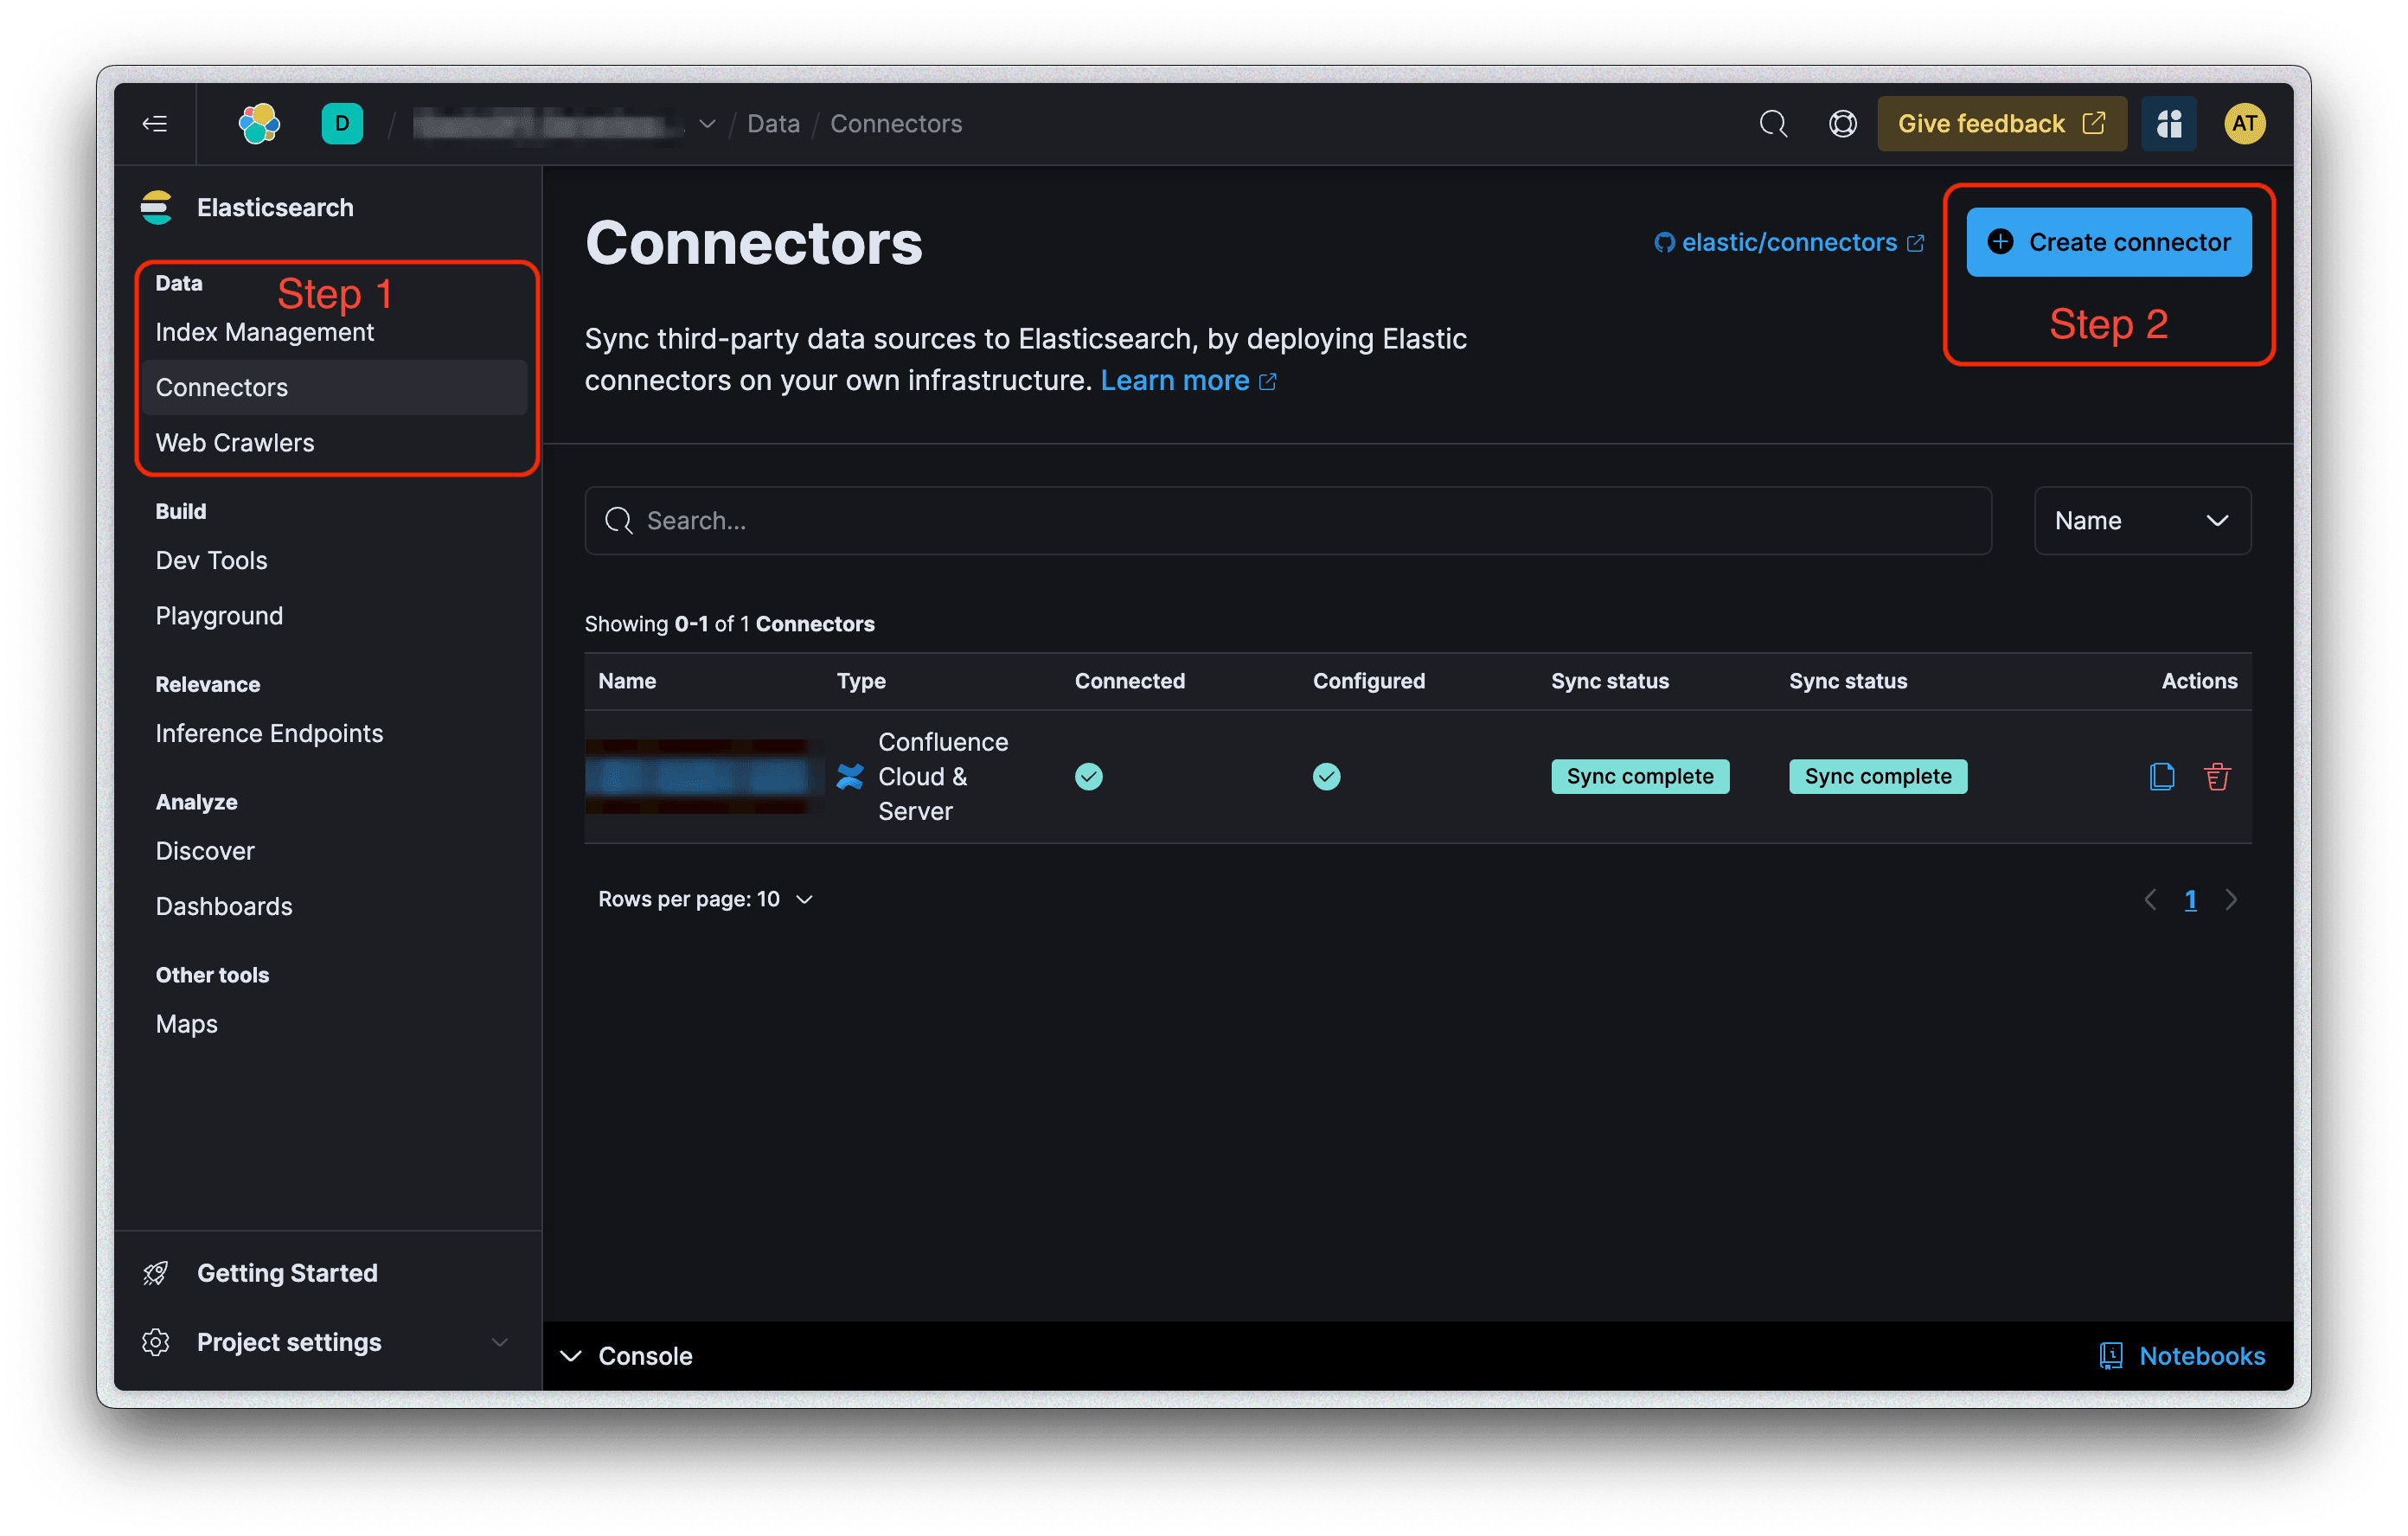
Step 1: Create Your Connector via the Elastic Cloud UI
-
Navigate to the Elastic Cloud UI.
-
Click on the "Connectors" tab.
-
Hit the "Create Connector" button.
-
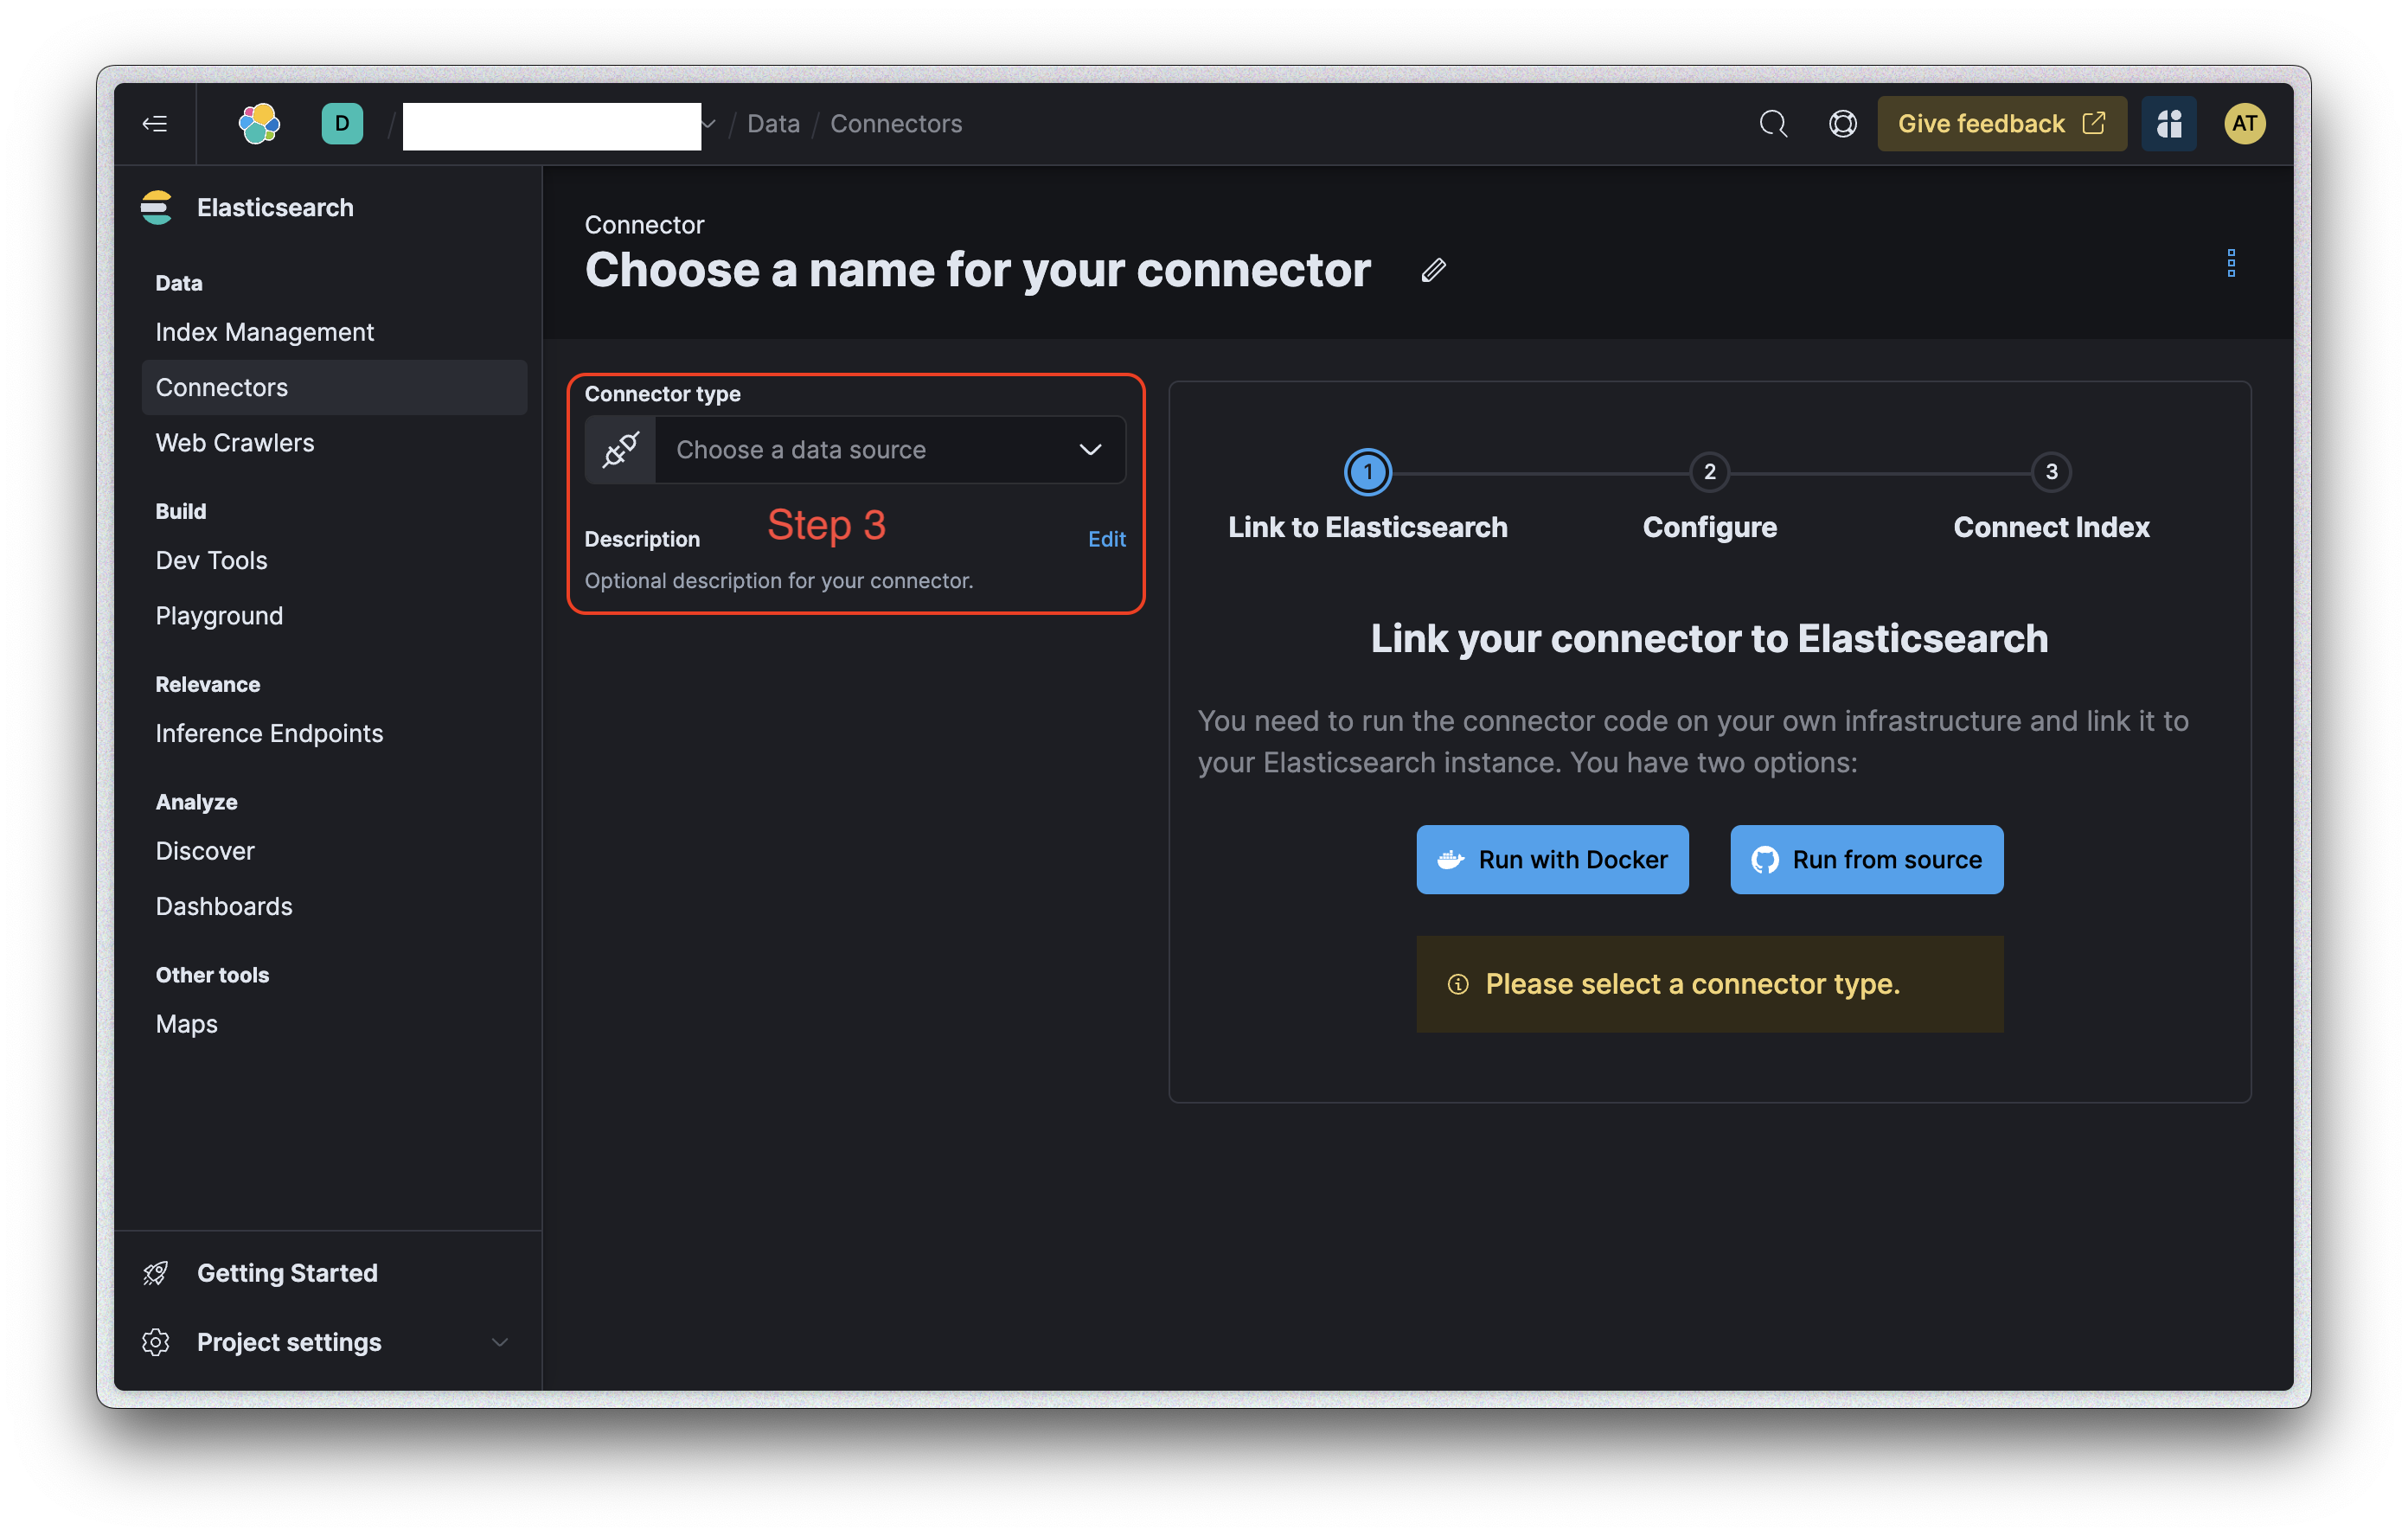
From the dropdown, select "Confluence Cloud & Server". (See Image 2, Step 3.)
-
When you select "Confluence Cloud & Server", the right-hand side will display pre-populated data.
-
Copy the code snippet provided for the "Confluence Cloud & Server" option. You'll need this for the next steps.
Step 2: Prepare the Configuration File
- Open your terminal and navigate to the directory where you want to set up the Docker image. It’s a good idea to create a dedicated directory for the connector:
mkdir elastic-connector-confluence
cd elastic-connector-confluence
mkdir connectors-config
cd ..- Clone the sample configuration file:
curl https://raw.githubusercontent.com/elastic/connectors/main/config.yml.example --output ./connectors-config/config.yml-
Update the configuration:
- Open
config.ymlin your favorite text editor. - Clear its current contents.
- Paste the code snippet you copied in Step 1.
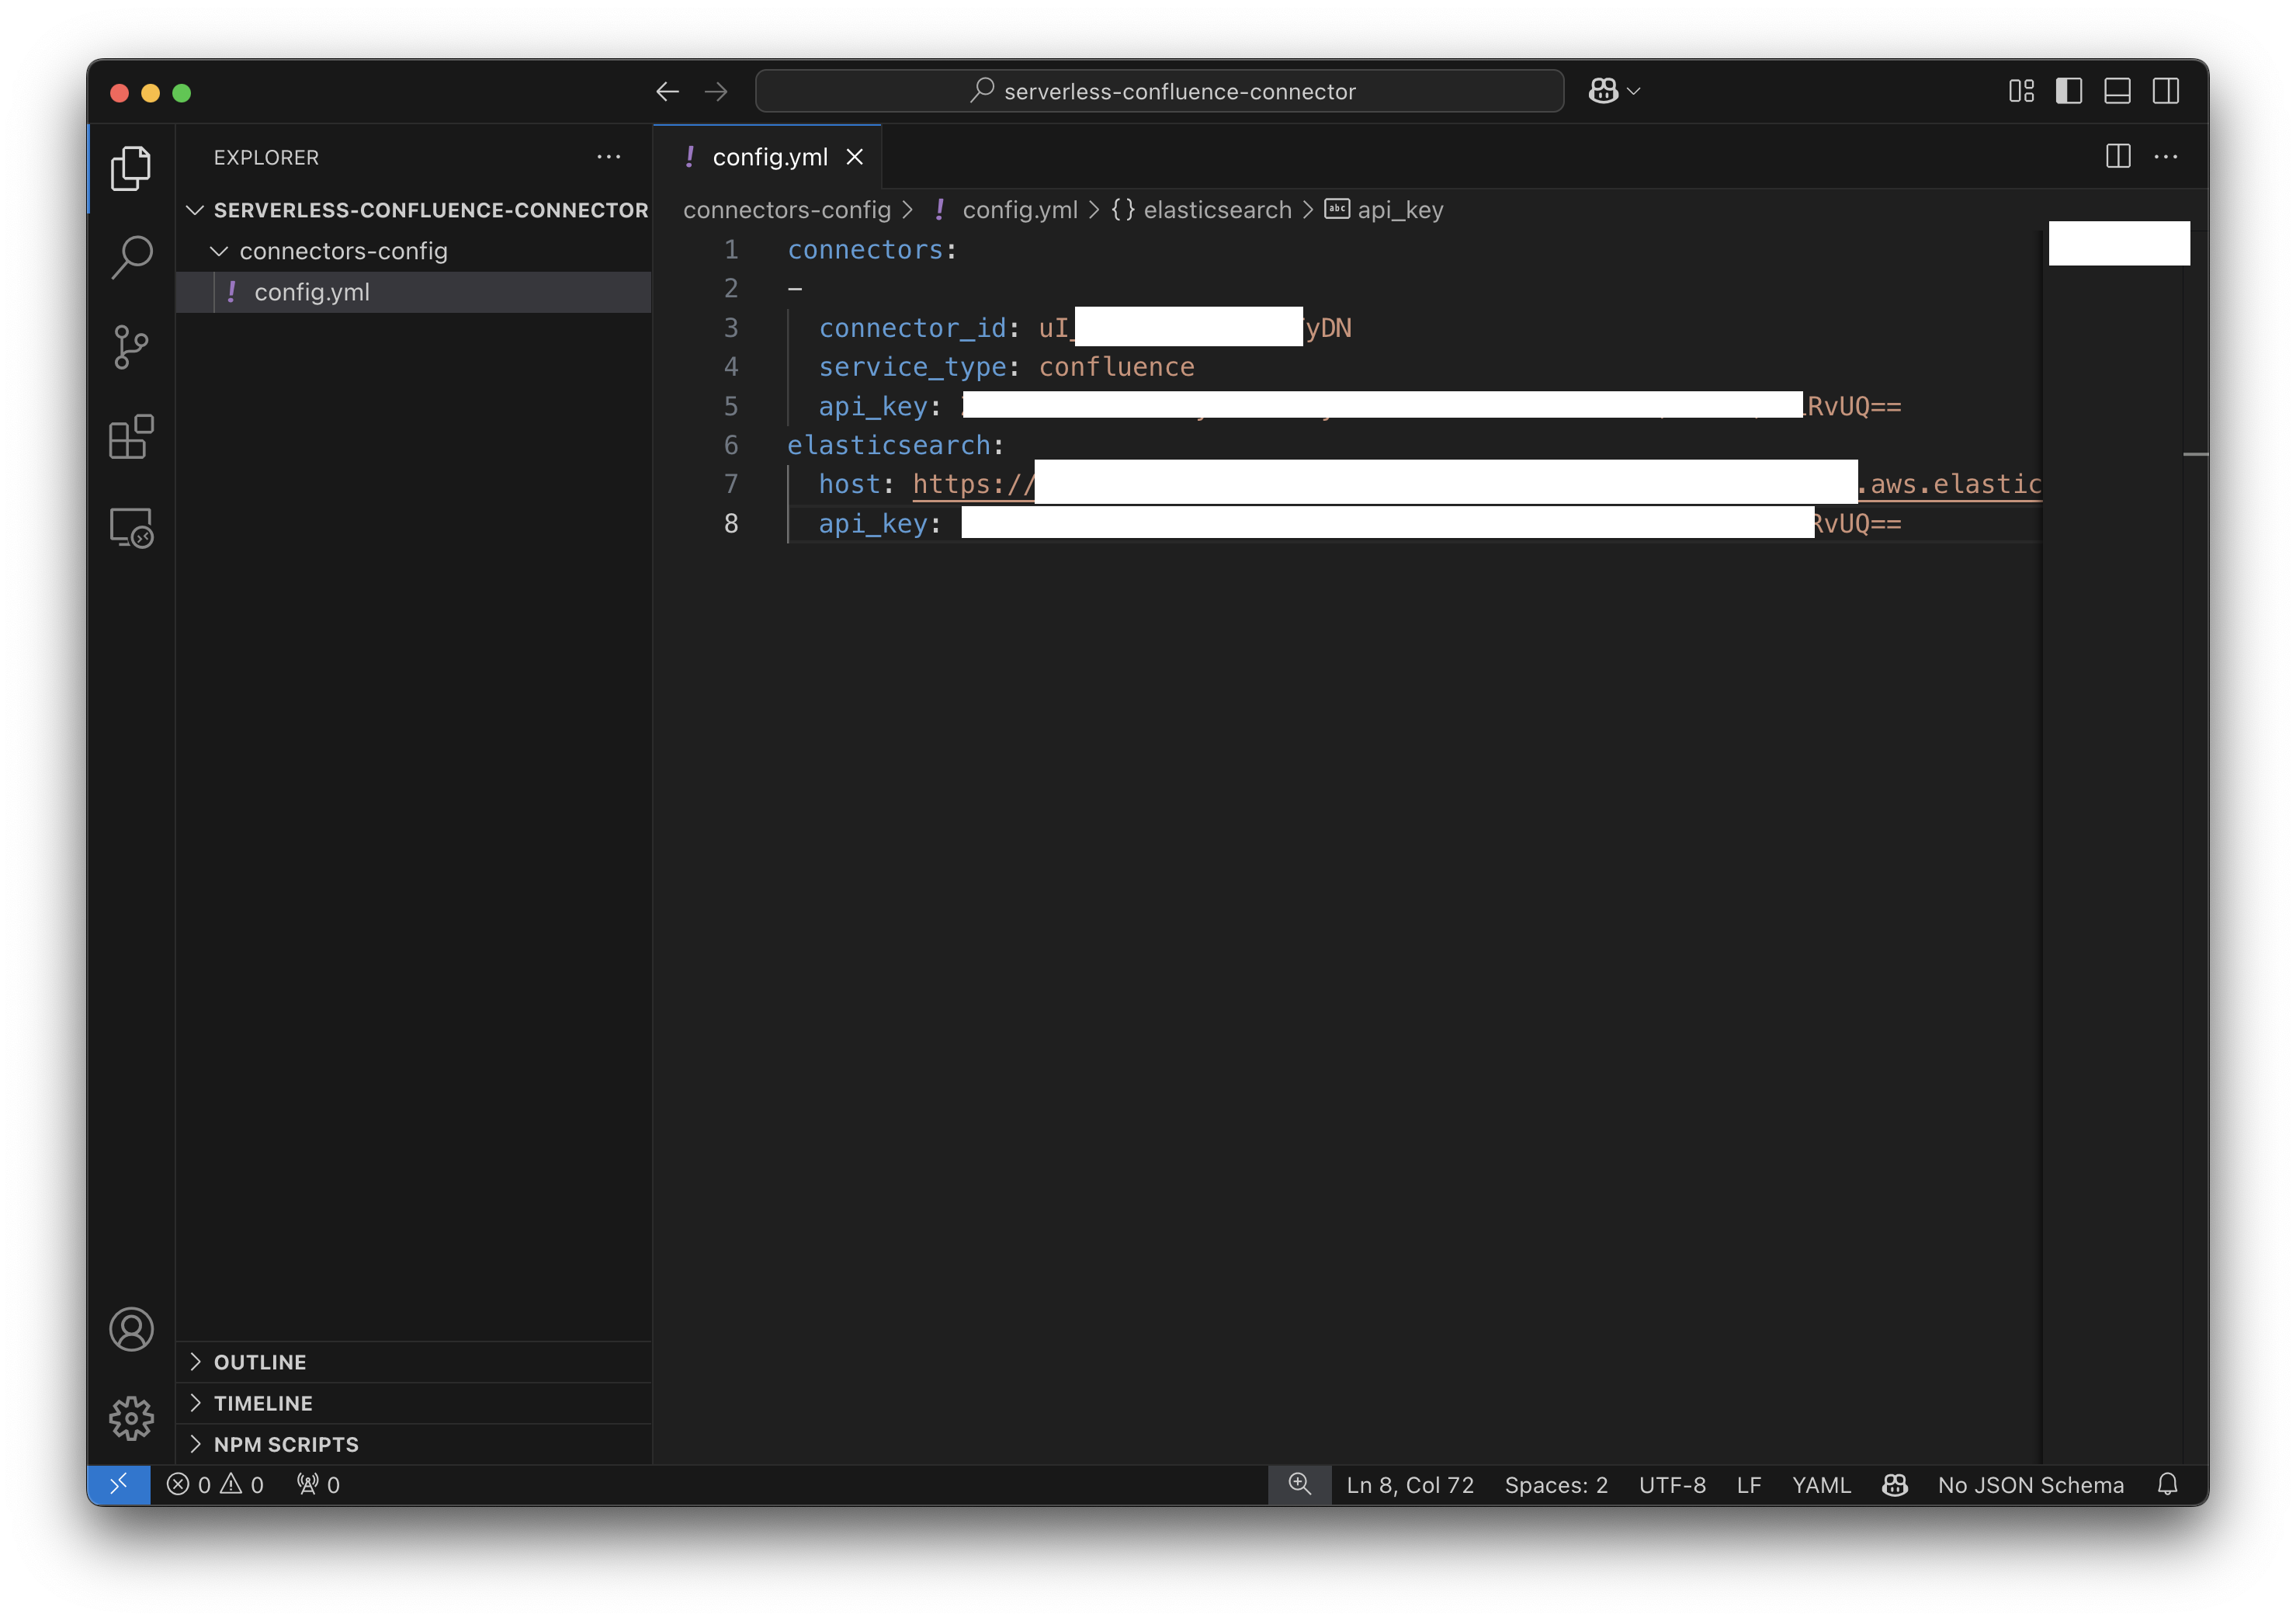
- Open
-
Save and close the file.
Step 3: Build the Docker Image
-
Run the following command from the root directory of your connector setup. This command builds and runs the Docker image using your custom configuration:
-
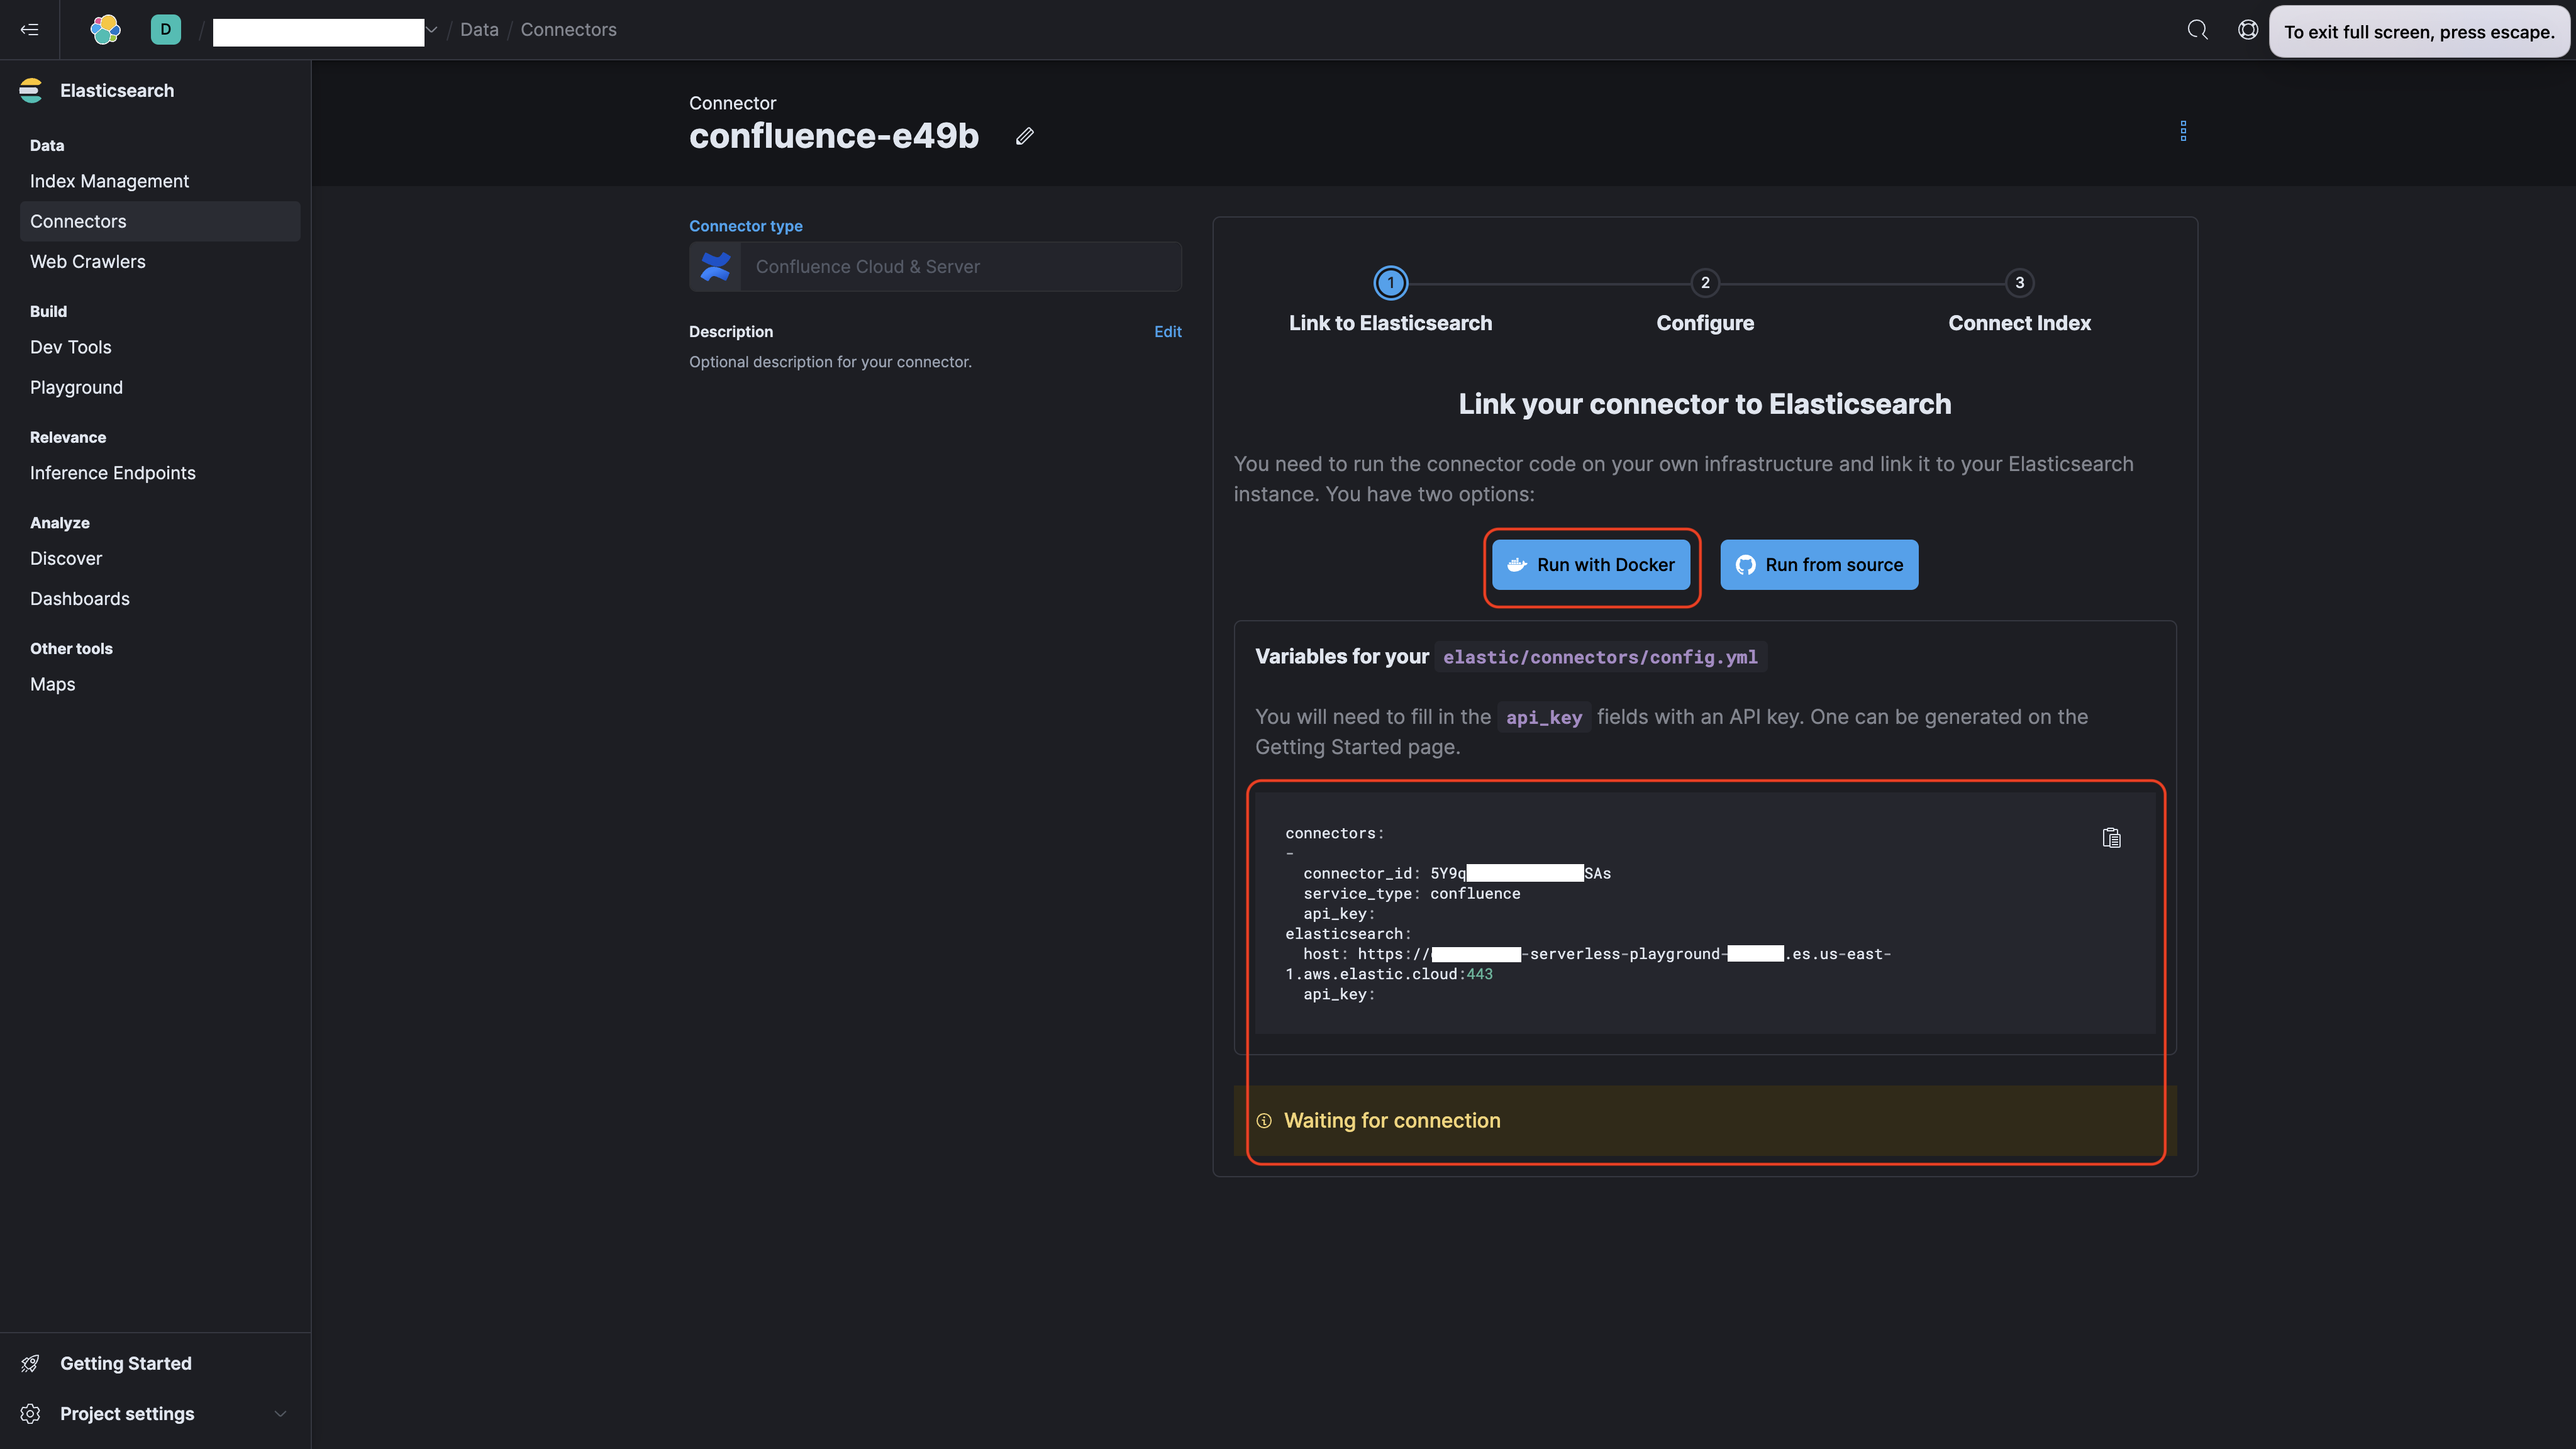
Tip: Check the Elastic Cloud UI; you should see the connector status labeled as "Waiting for connection."

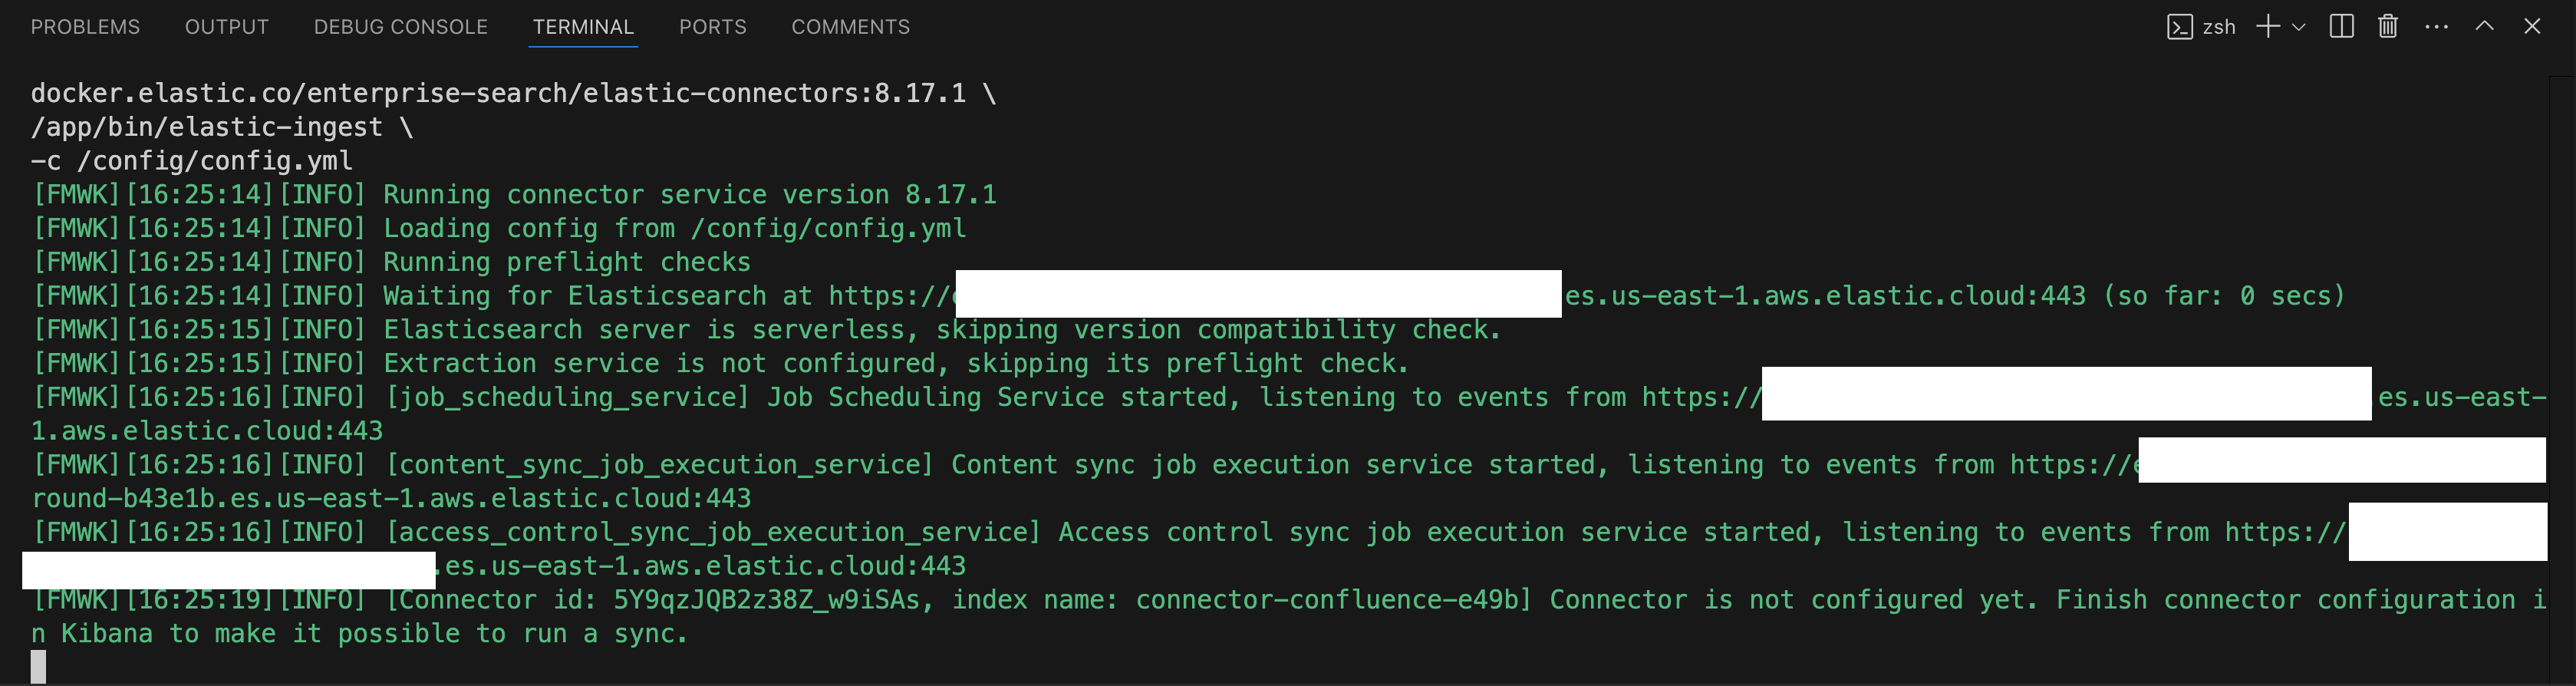
Step 4: Start the Connector
- Make sure Docker is running.
- Start the connector by executing:
docker run \
-v "serverless-confluence-connector/connectors-config:/config" \
--tty \
--rm \
docker.elastic.co/enterprise-search/elastic-connectors:8.17.1 \
/app/bin/elastic-ingest \
-c /config/config.yml-
Watch your terminal: You should see output similar to the image below, indicating that the connector is up and running.
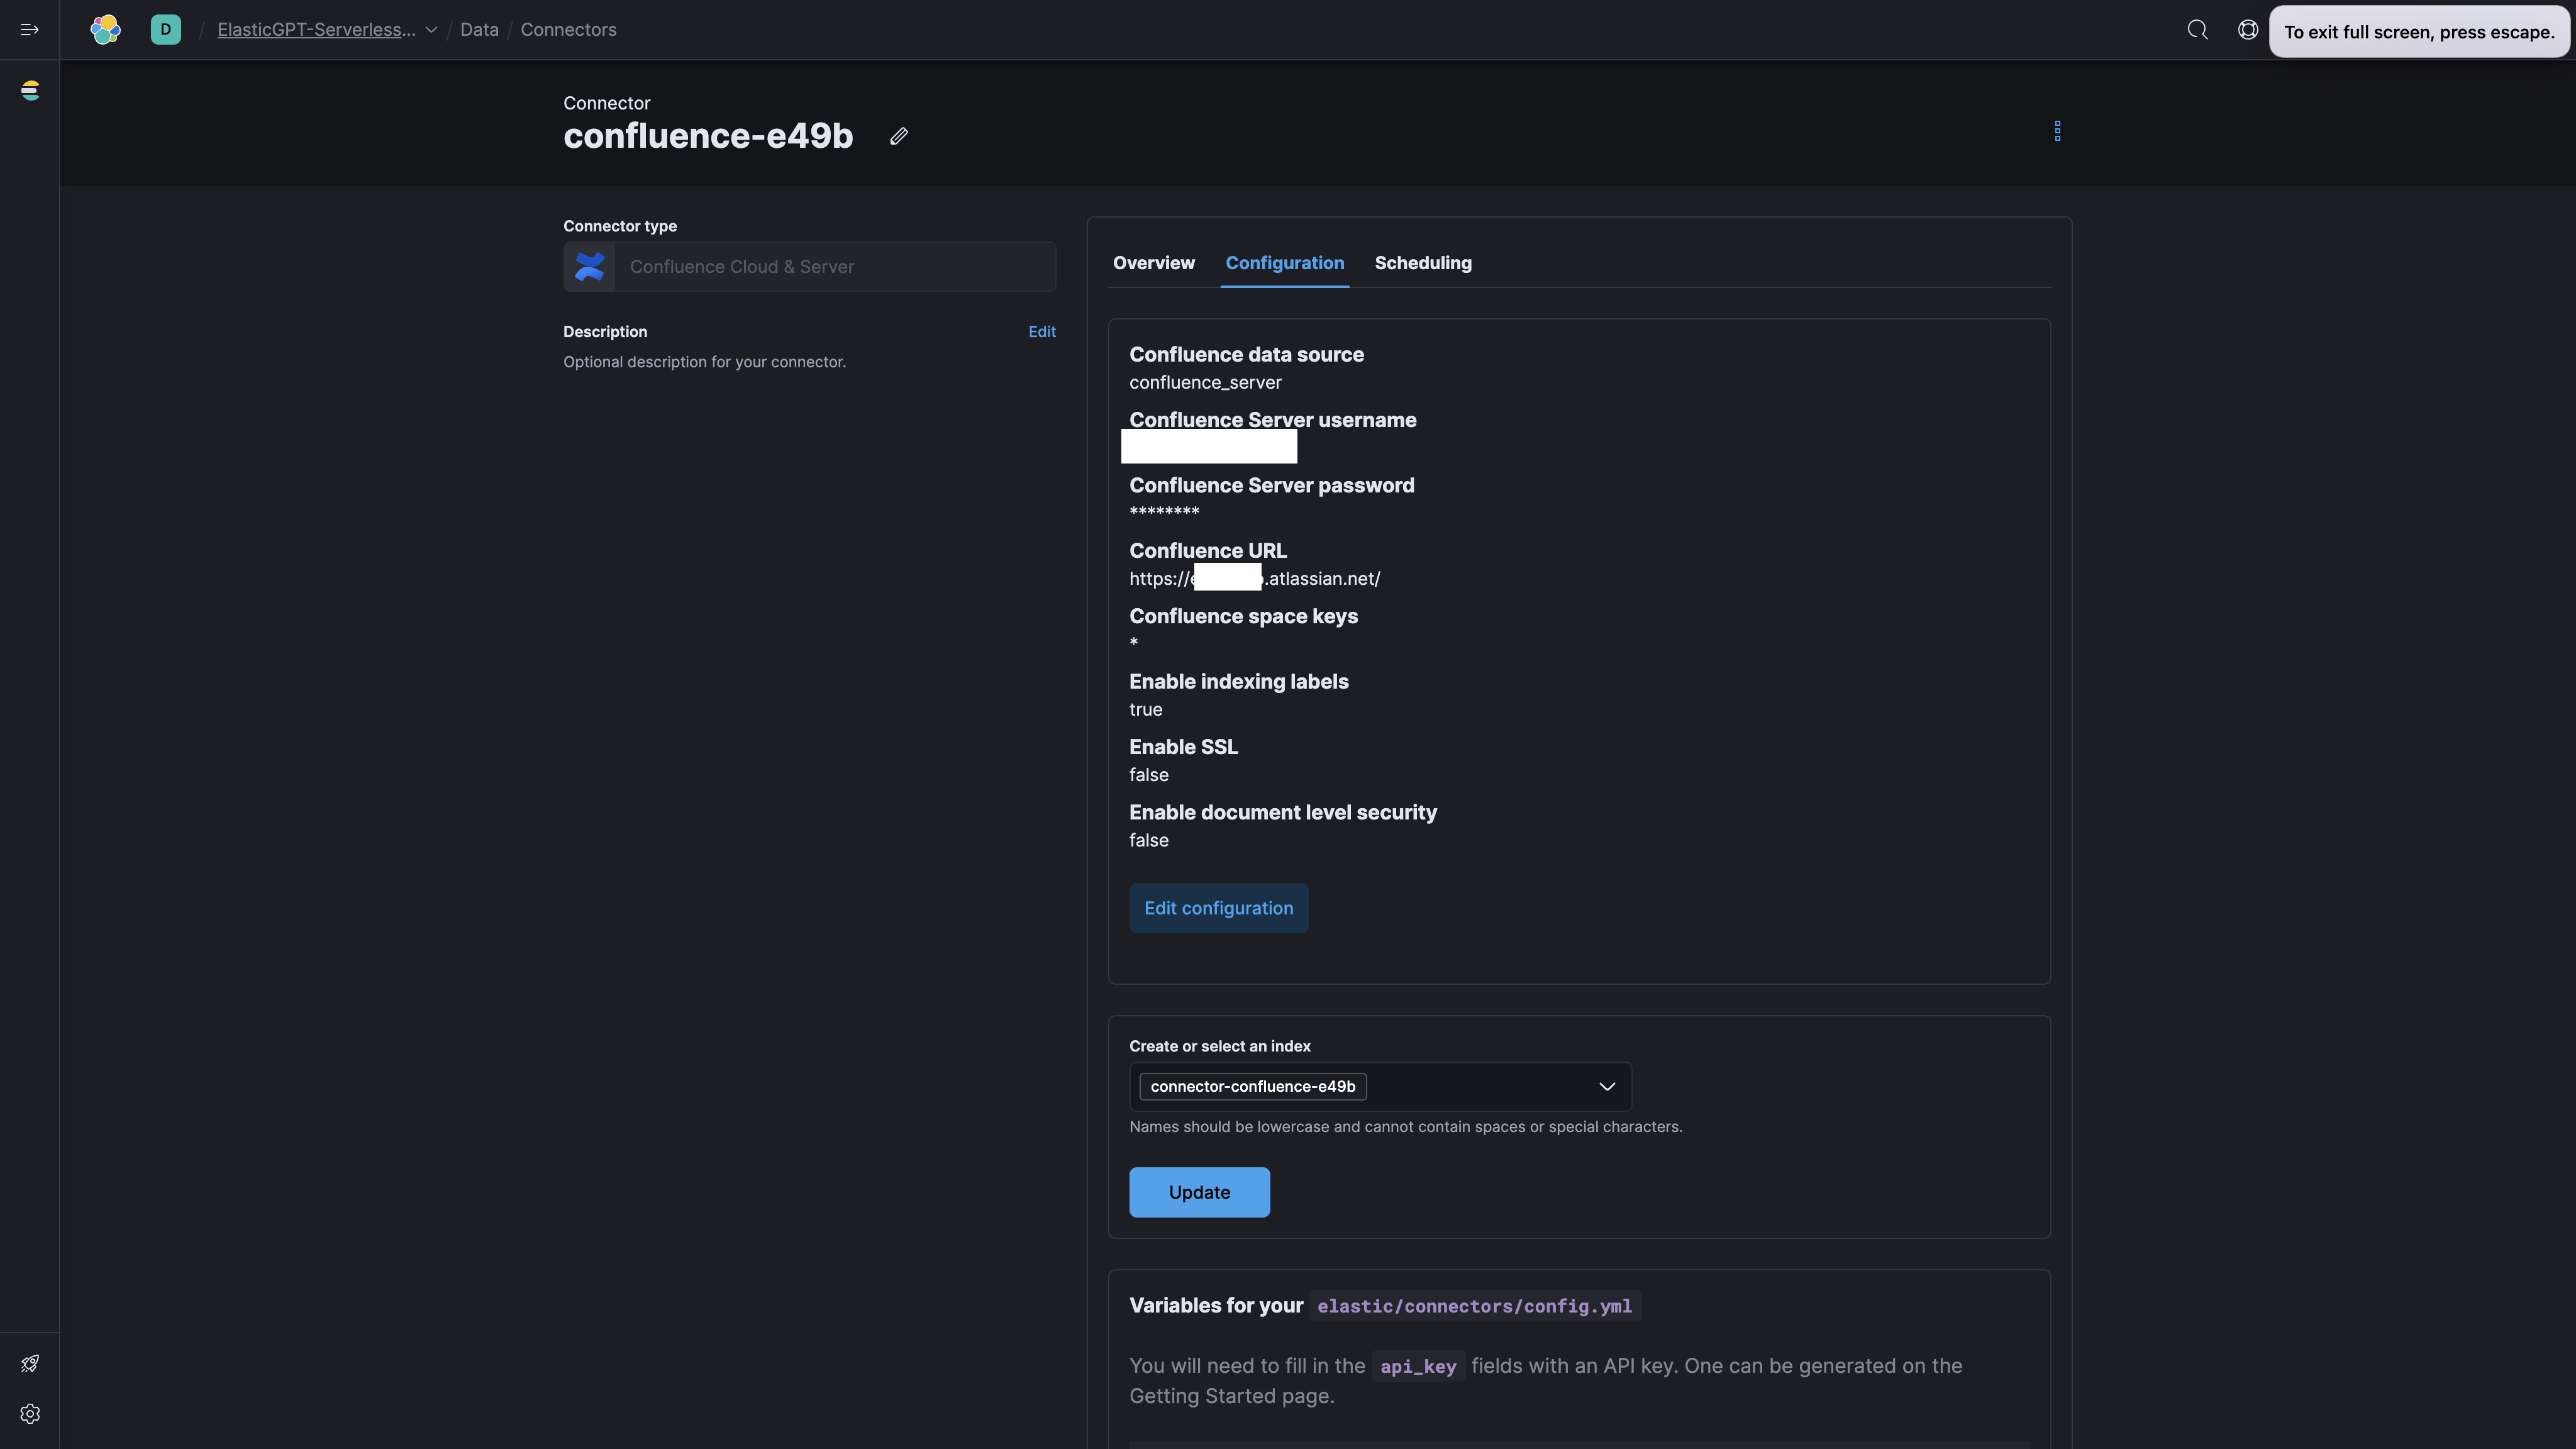
Step 5: Verify the Connector
Now, verify that everything is working as expected:
-
Navigate back to the Elastic Cloud UI.
-
When prompted, enter the details for your Confluence Cloud service.
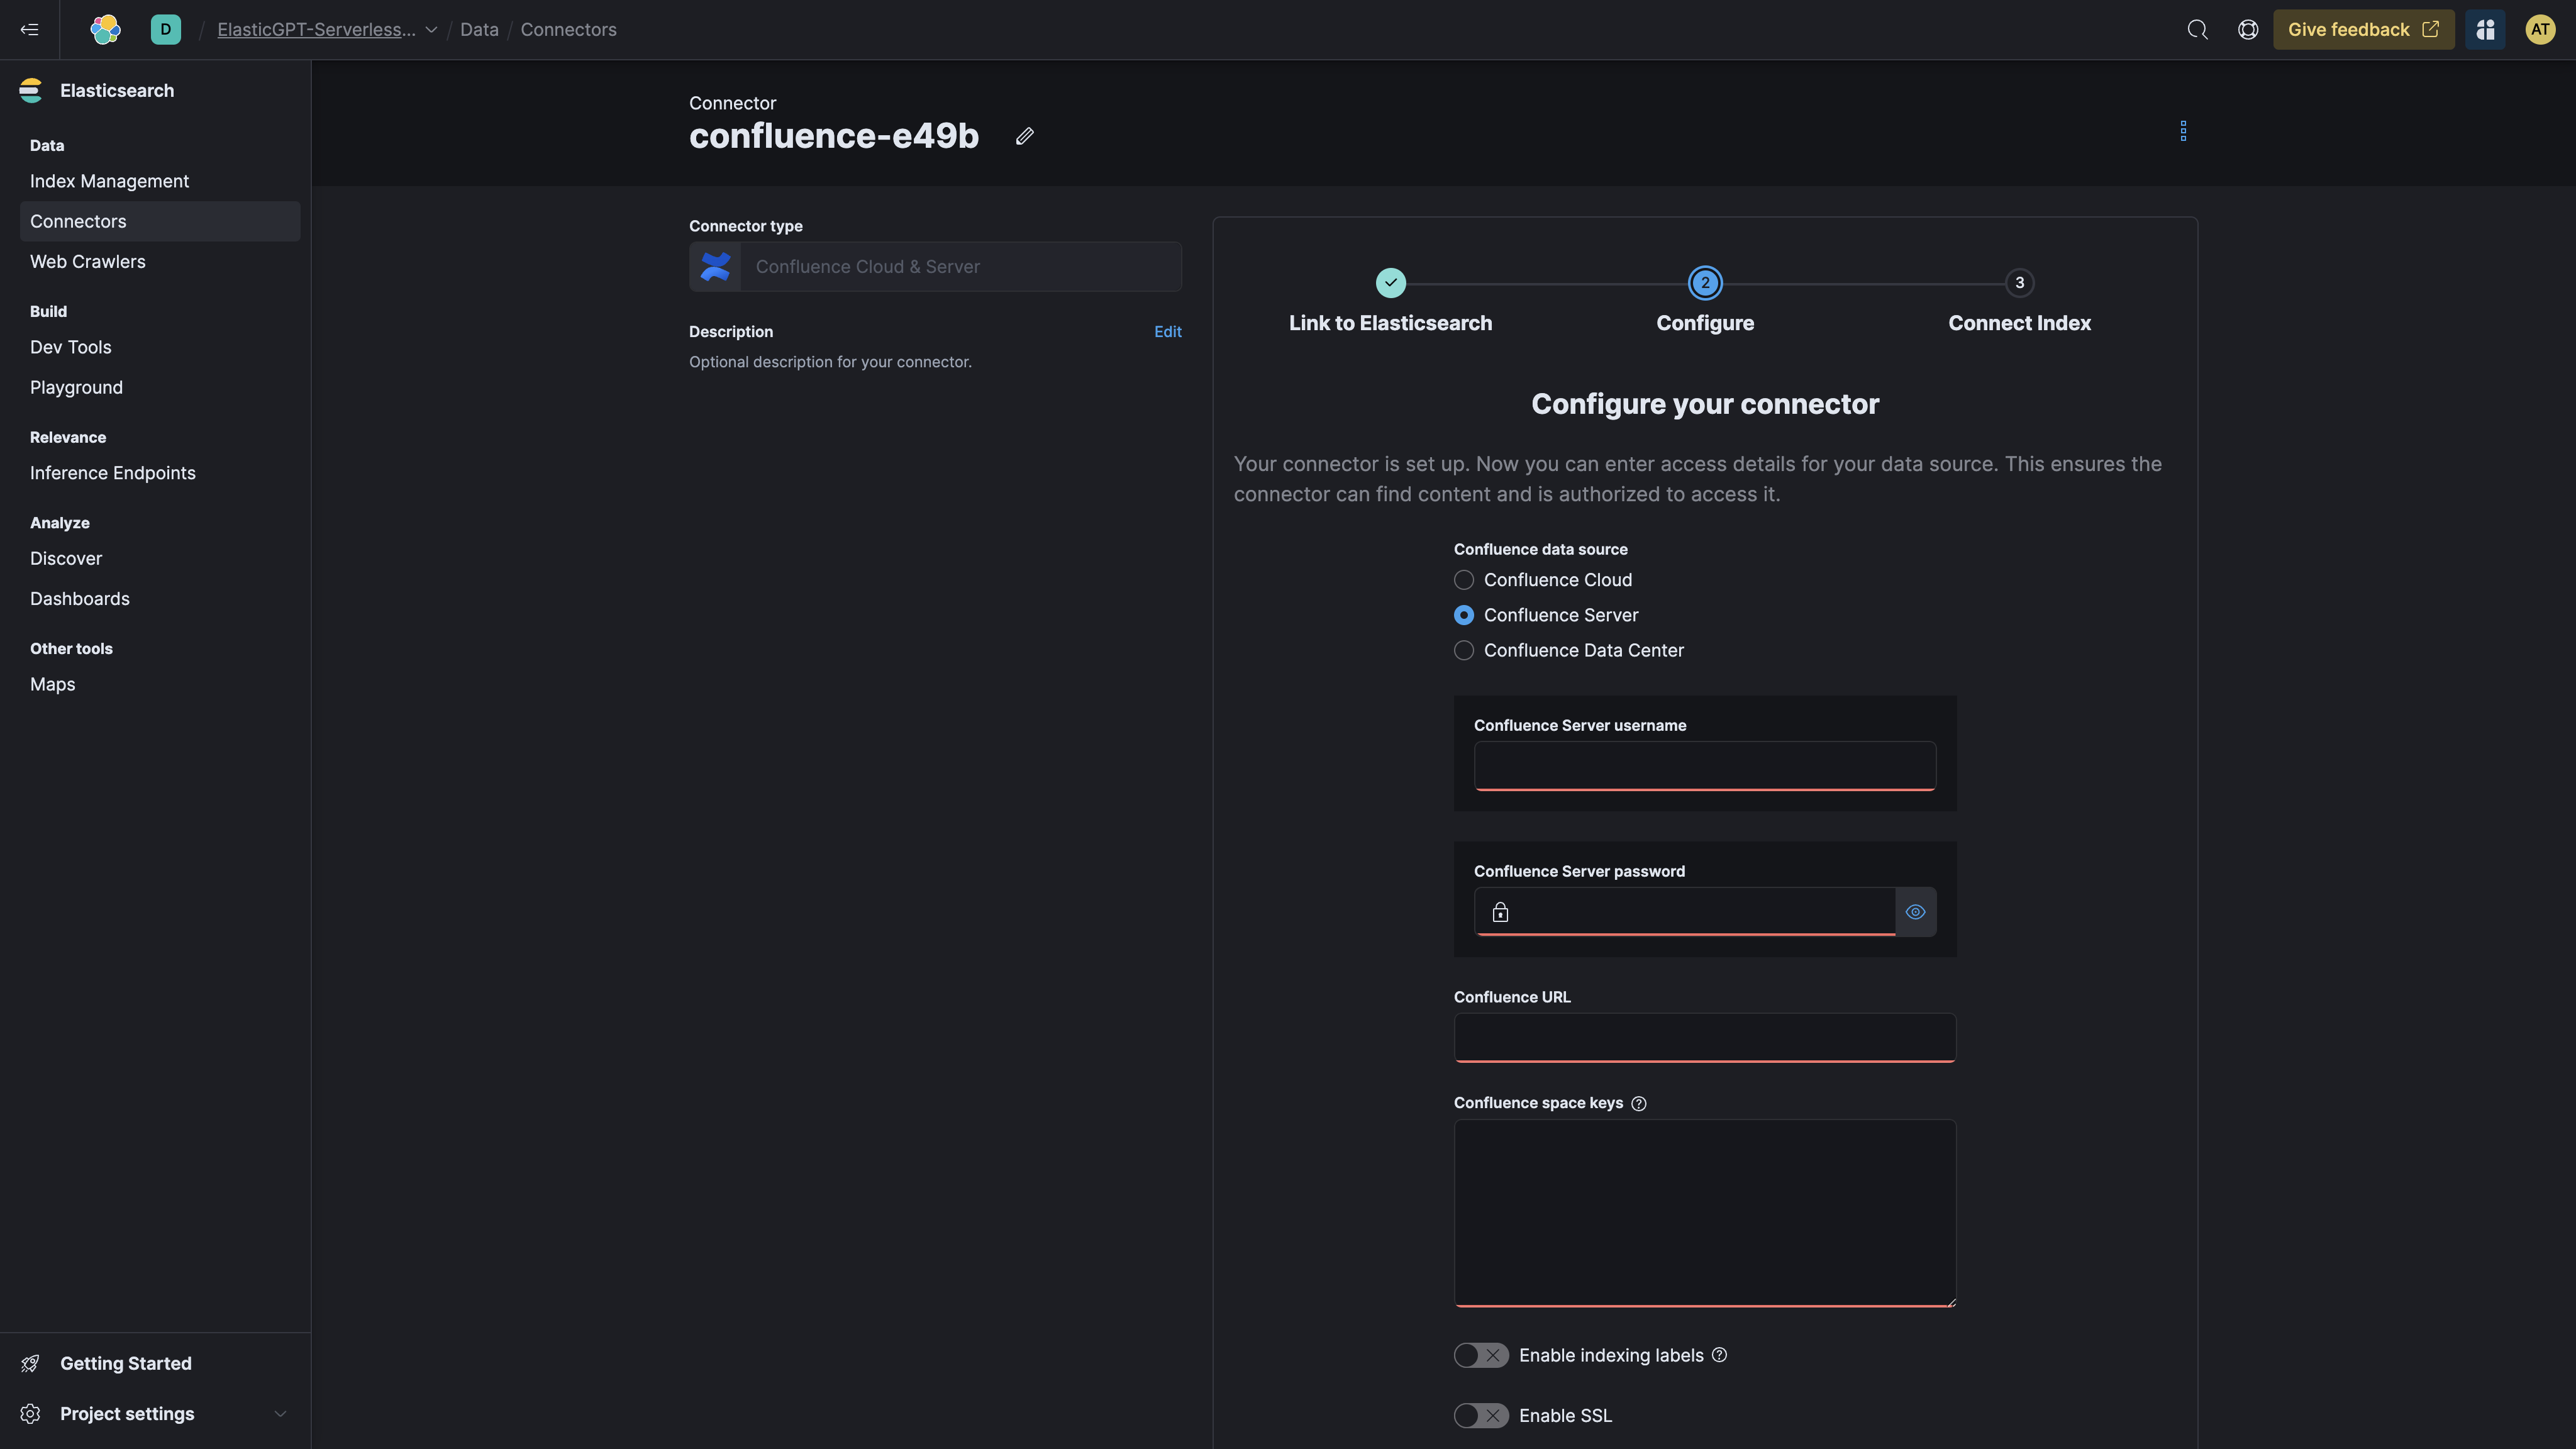
-
After you submit the details, you'll be redirected to the Confluence Cloud UI, and a new index should be created in Elasticsearch.
Step 6: Start Syncing!
With the connector running, it's time to sync your data:
-
Simply click the "Sync" button in the UI.
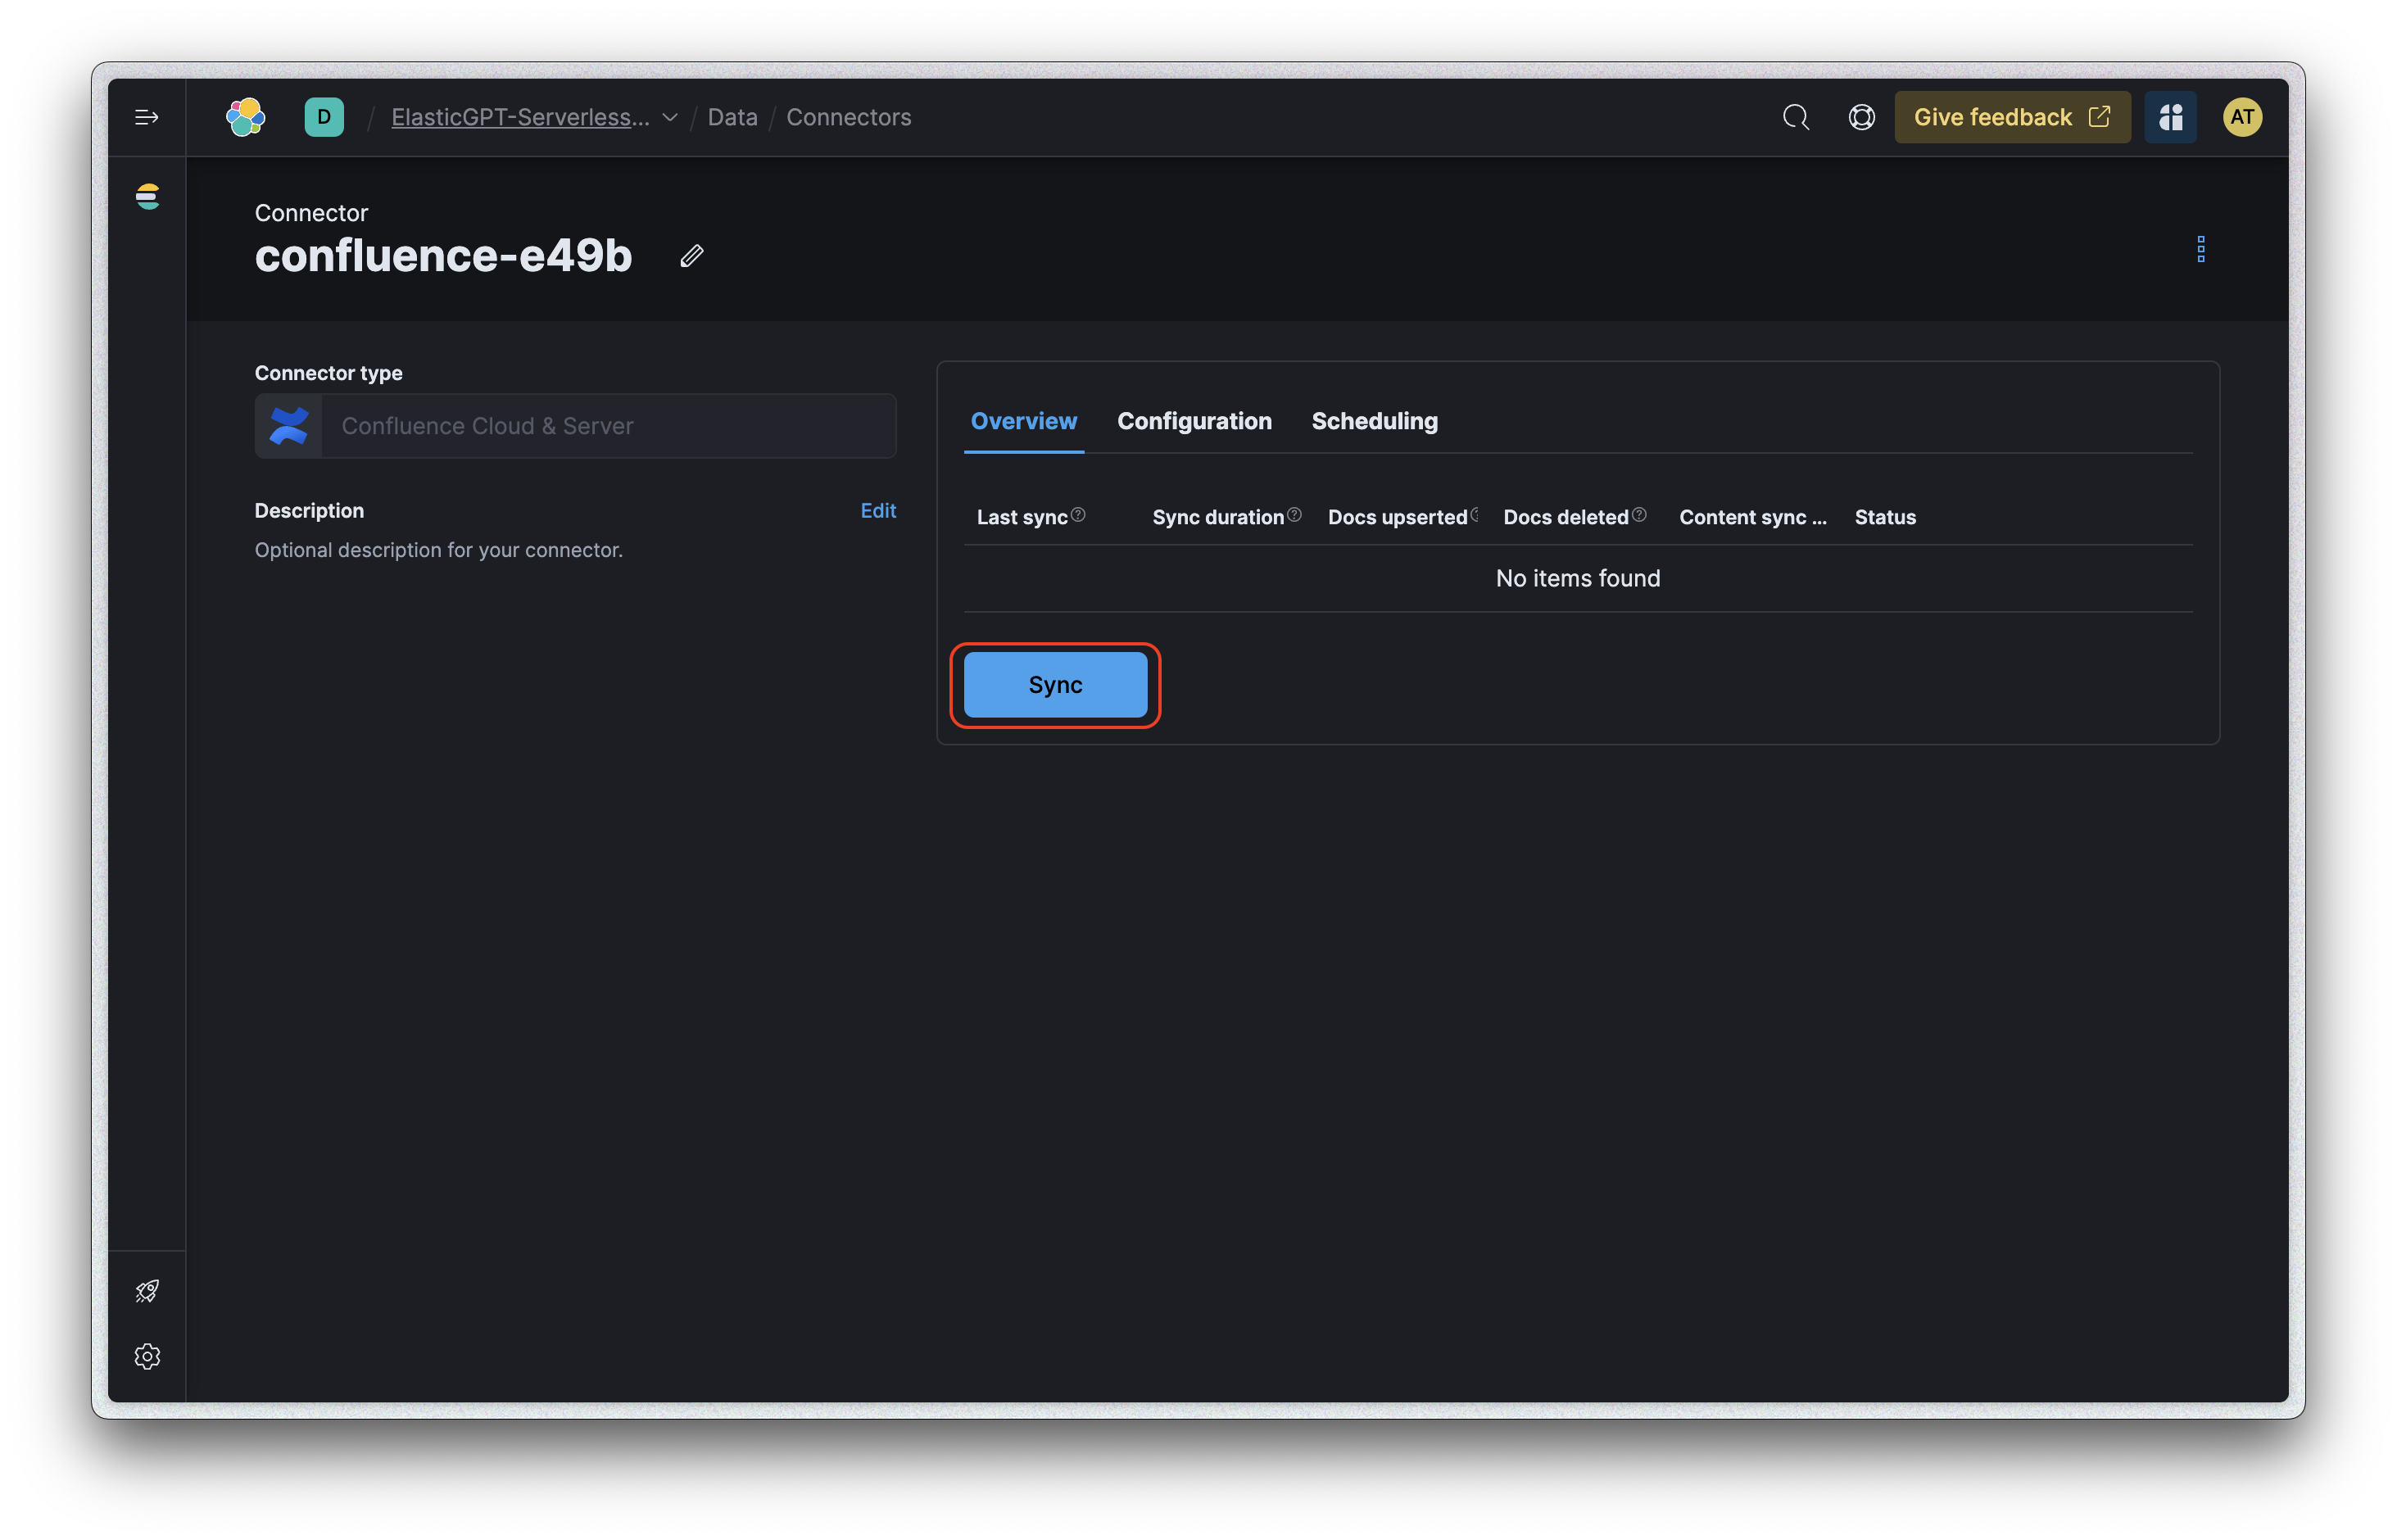
-
The sync process will kick off, and you can monitor its progress directly in the UI.
The Elastic Connector is now running locally via Docker and syncing Confluence into Elasticsearch.
To end the connection, go to the terminal and press Ctrl + C.